

Salesforce Payments helps you quickly enable different payment methods without writing any code. Please follow the below steps to enable and test Salesforce Payments with your SFRA base layer.
- In your instance, Salesforce payments are not by default enabled. Raise a Support ticket under https://help.salesforce.com/s/cases to get the feature enabled for your sandbox.
- Once the feature is enabled, you will see the modules below in your Business Manager.
Merchant Tools > Ordering > Salesforce Payments
Administration > Global Preferences > Salesforce Zones
Administration > Global Preferences > Salesforce Payments
Associate Merchant Accounts with Salesforce Payments
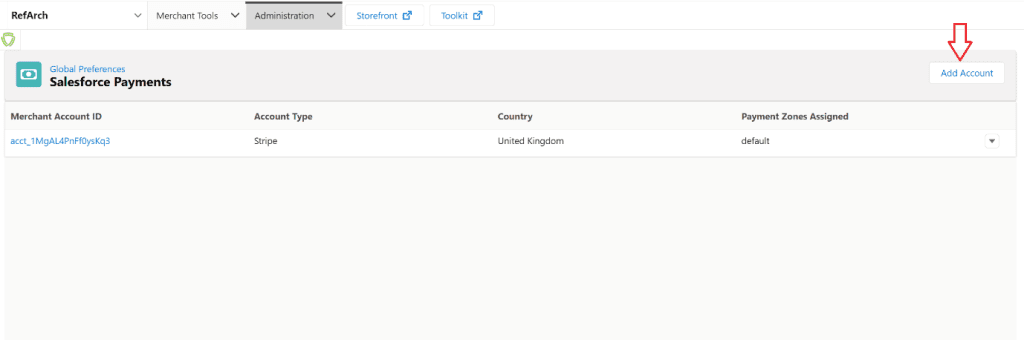
- Go to Administration > Global Preferences > Salesforce Payments and click the +Add Account button.

- You will see the modal window below after clicking the Add Account button.
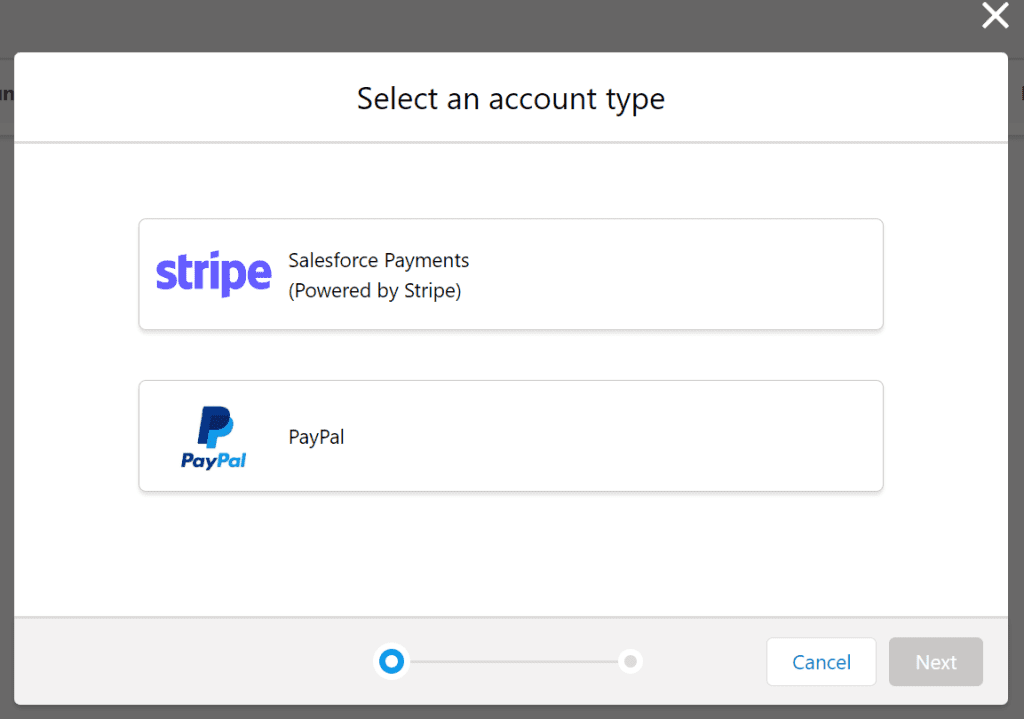
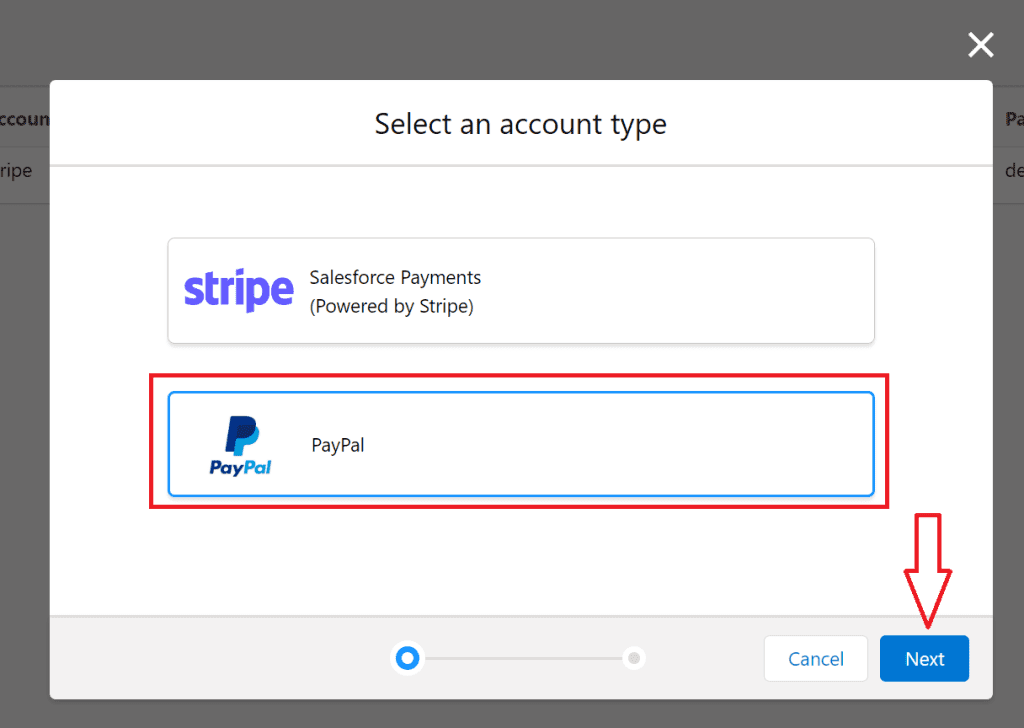
- Currently, SFCC supports the below payment gateways:
Stripe – Create a Stripe test account at https://dashboard.stripe.com/register
PayPal – Create a PayPal test account at https://developer.paypal.com/
Setup Stripe Payment Gateway
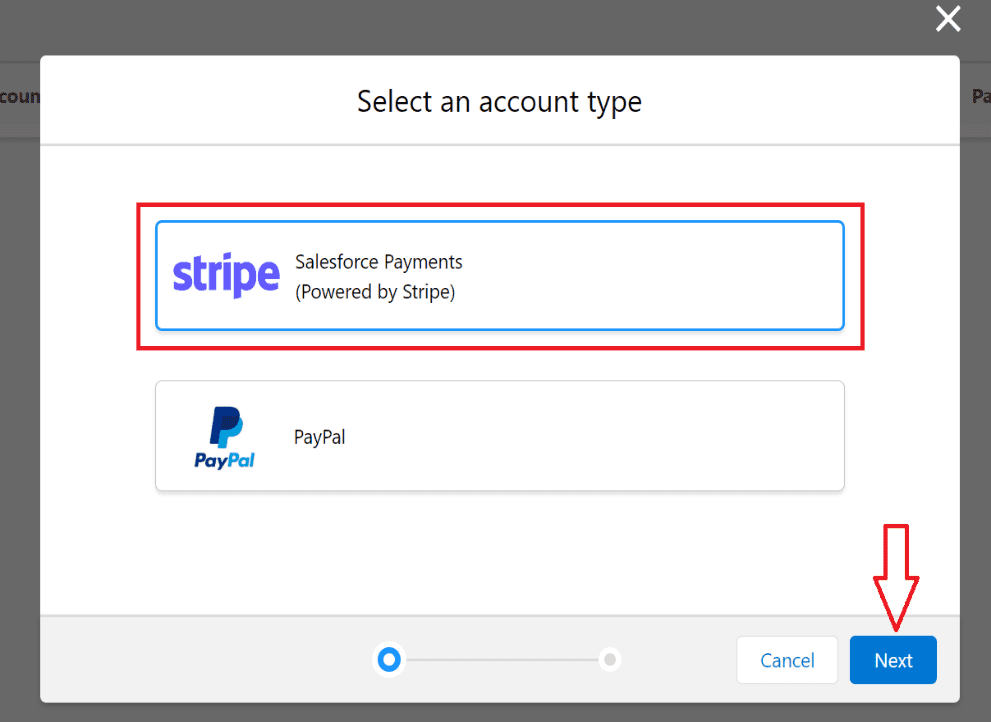
- Once you have created the Stripe test account, associate the “Stripe” merchant account with Salesforce payments. Click Stripe in the modal window and click Next.
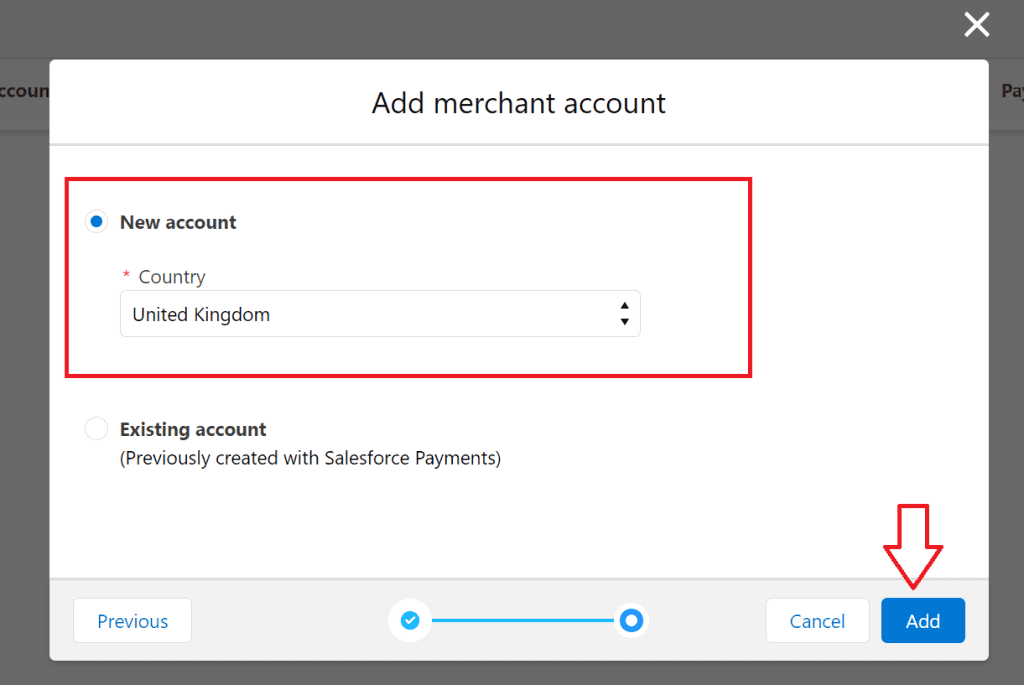
- Select the country where the merchant business is legally established and click Add.
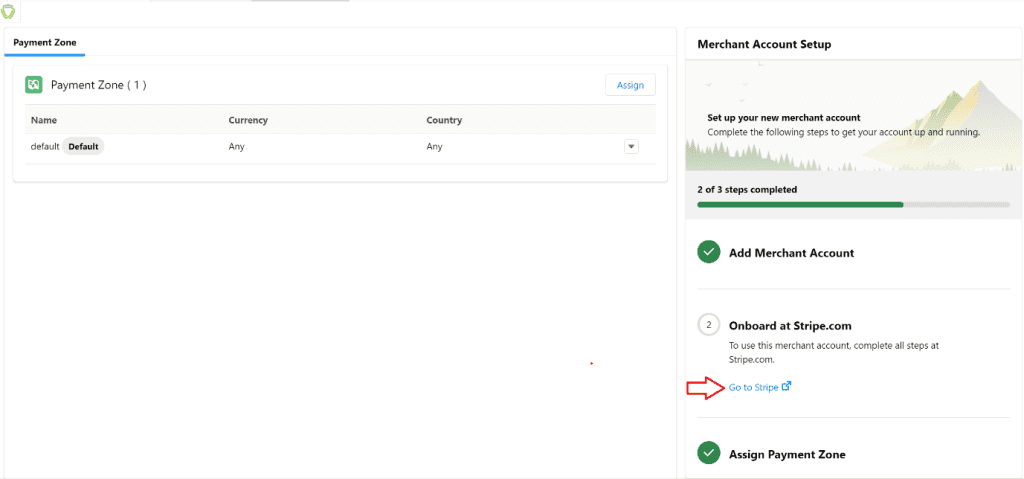
- You will see the below screen once the above steps are followed successfully. Click Go to Stripe here to complete the merchant onboarding process. This will take you to the Stripe login page.
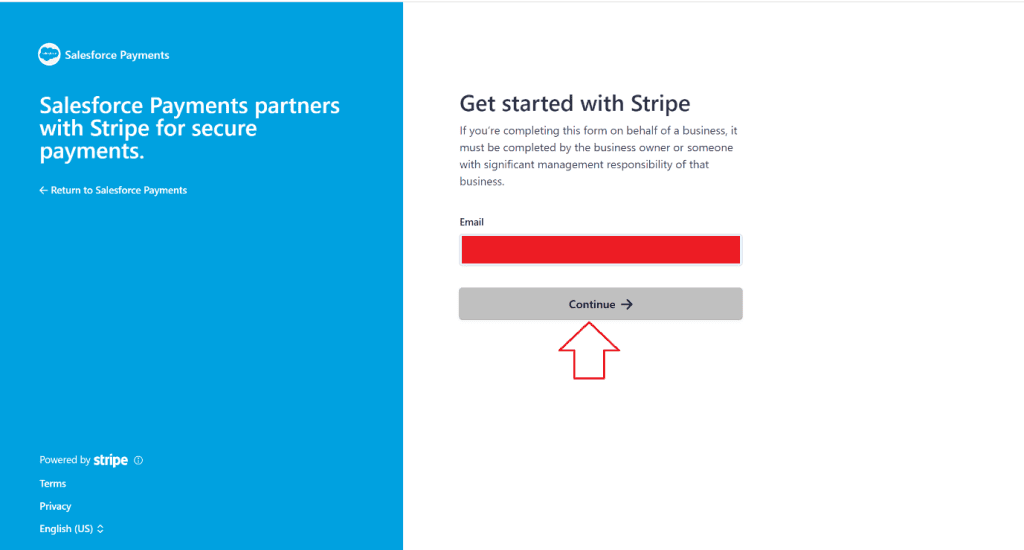
- Enter the email address associated with your Stripe account and click Continue.
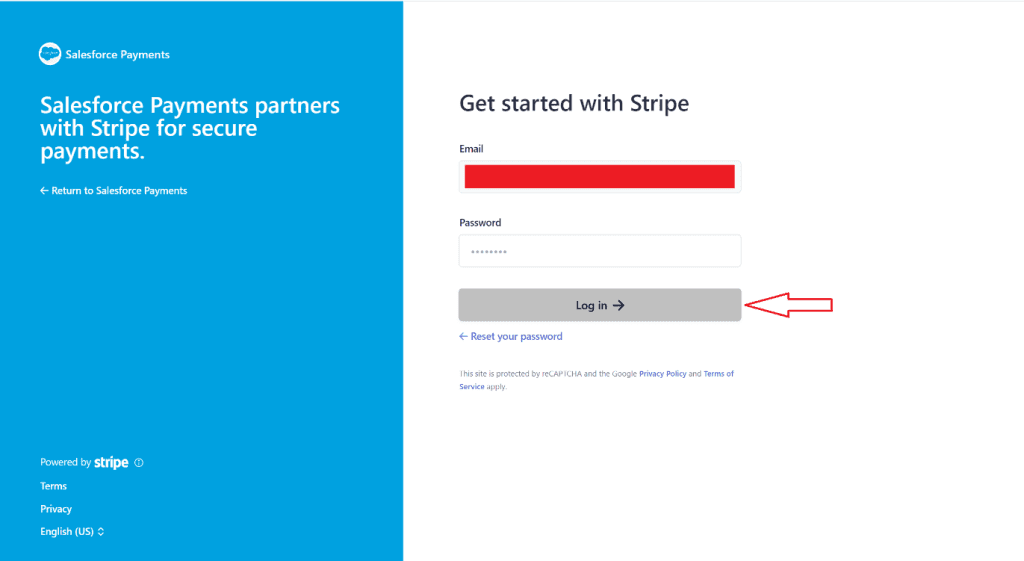
- Enter your Stripe password and click Login.
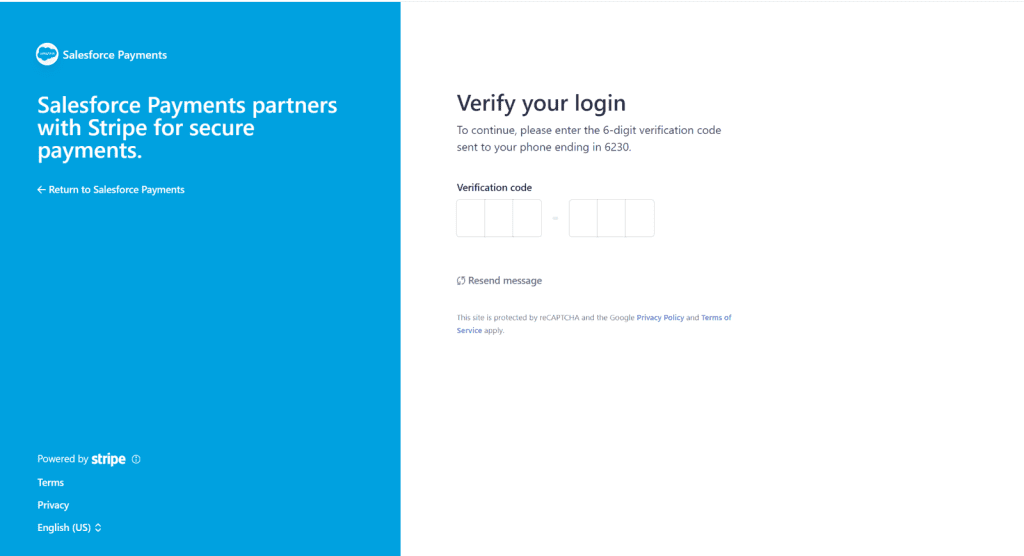
- Enter the OTP sent to your registered phone number.
- Select Create a new business and click Continue.

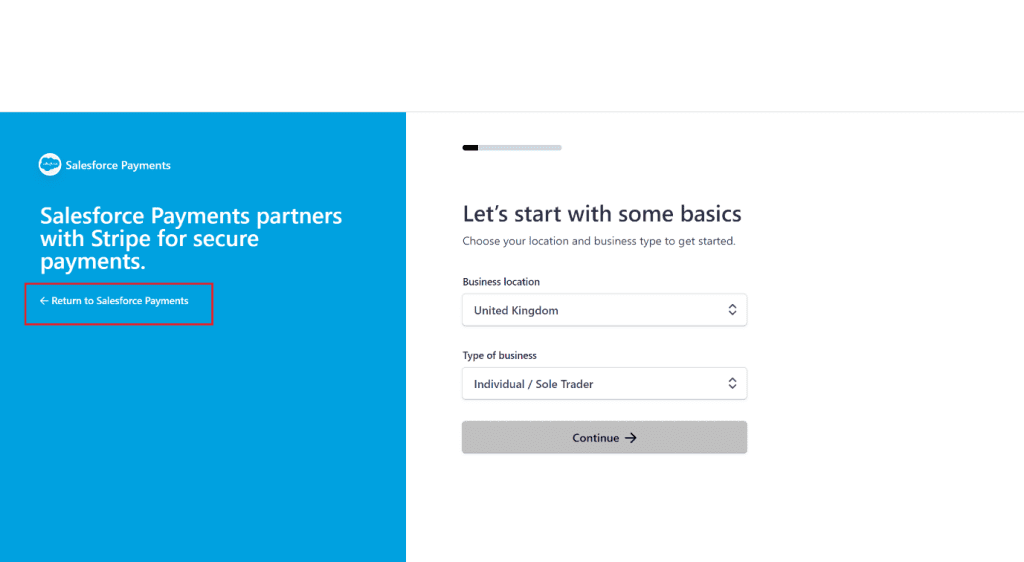
- You can click Return to Salesforce Payments at this stage, as you are using a test account. If it is for a live account, complete the onboarding process. The Stripe test merchant account setup with Salesforce payments is complete with this.
Setup PayPal Payment Gateway
- Go to Administration > Global Preferences > Salesforce Payments and click the Add Account button.
- In the modal window Select PayPal and click Next.
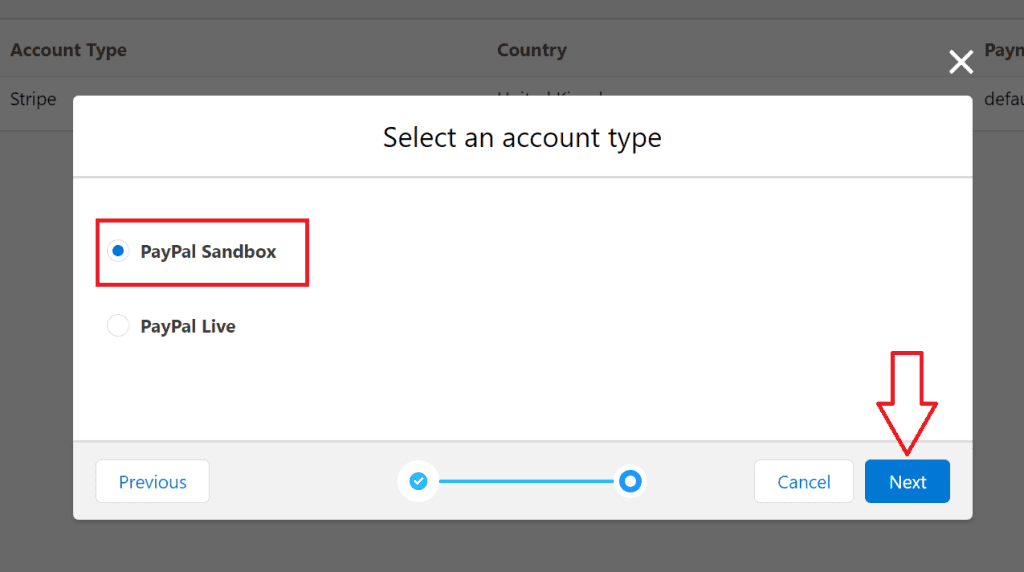
- Select PayPal Sandbox and click Next.
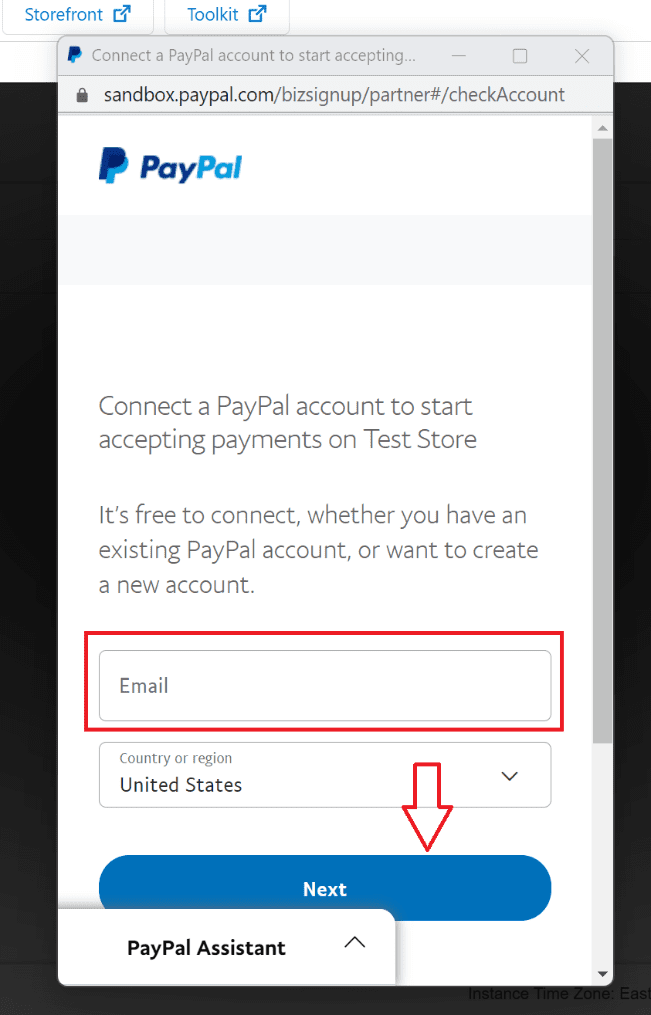
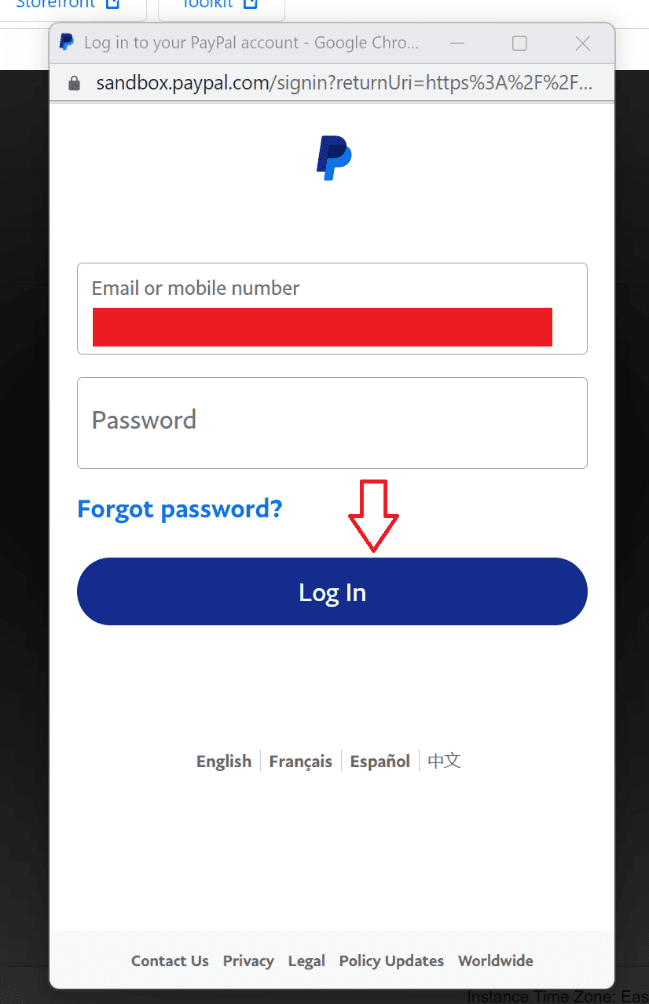
- Enter the email associated with your PayPal merchant account and click Next.
- Enter your PayPal password and click Log In.
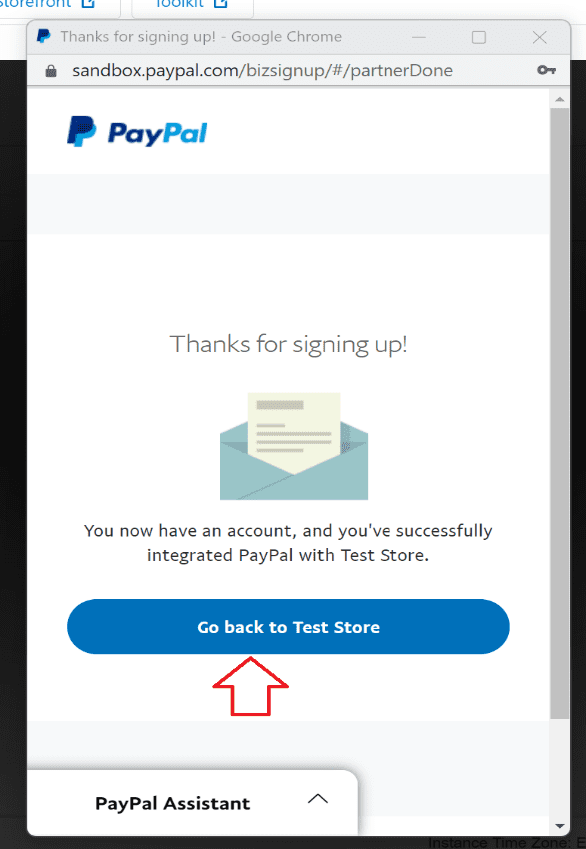
- Click Go back to the Test Store.
- Go to Administration > Global Preferences > Salesforce Payments. You will see two merchant account associations, one for Stripe and the other for PayPal. With this, the PayPal merchant account association with Salesforce Payments is complete.

Configure Payment Zones
Payment zones let you assign payment methods to specific countries and currencies. A default payment zone, set for all currencies and countries, is automatically created. You can create and assign more payment zones to your merchant account to customise which payment methods can be used for which zones. To create a new payment zone, follow the below steps.
- Go to Administration > Global Preferences > Payment Zones and click the New button. This will open below the modal window.
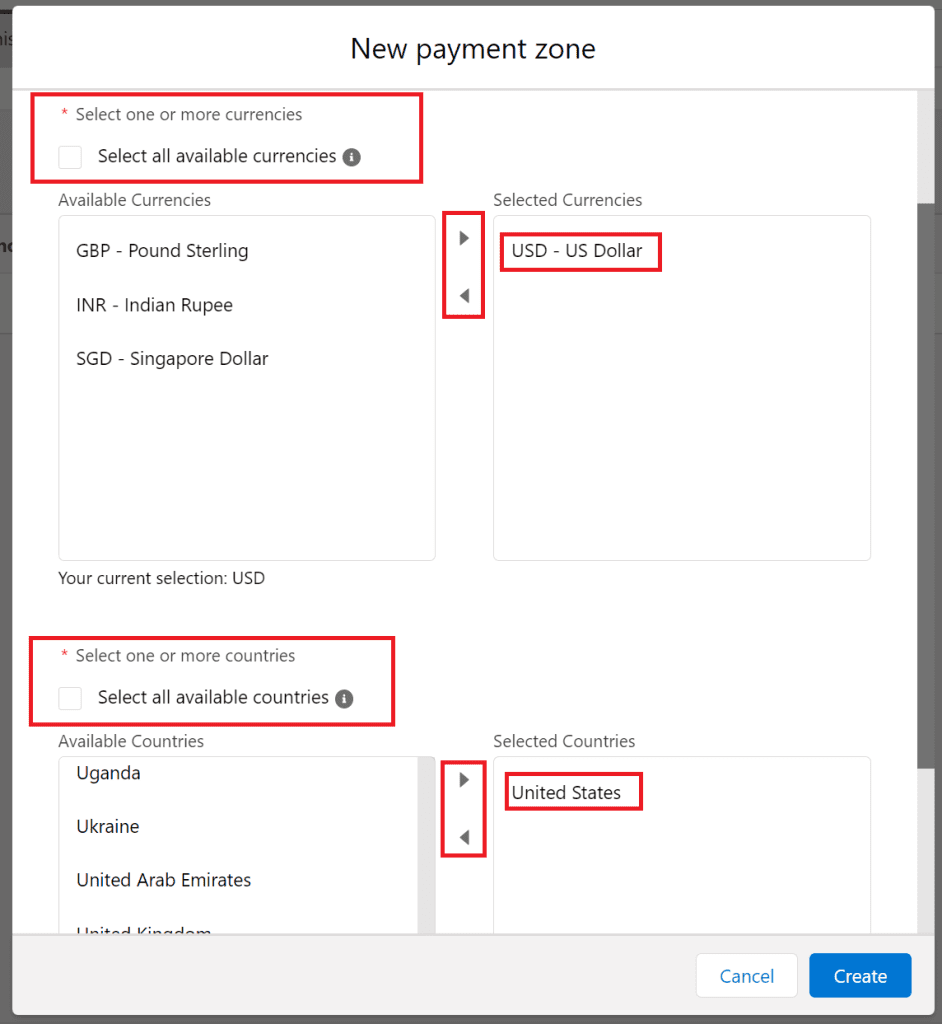
- Enter a payment zone name (example: USD_US).
- Select one or more currencies using the arrow buttons (example: USD-US Dollar).
- Select one or more countries using the arrow buttons (example: the United States).
In the below screenshot, the USD currency and US country have been selected.
- Now, to associate merchant accounts created in the previous section with this payment zone, click the down arrow button.
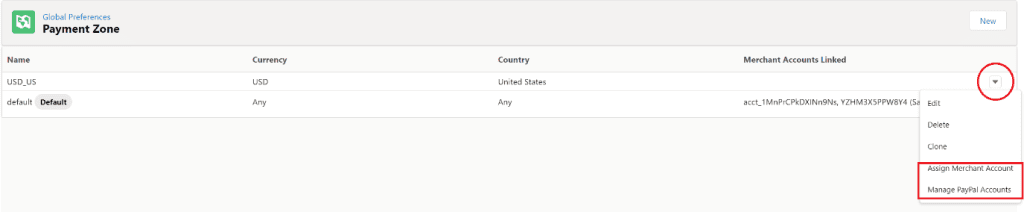
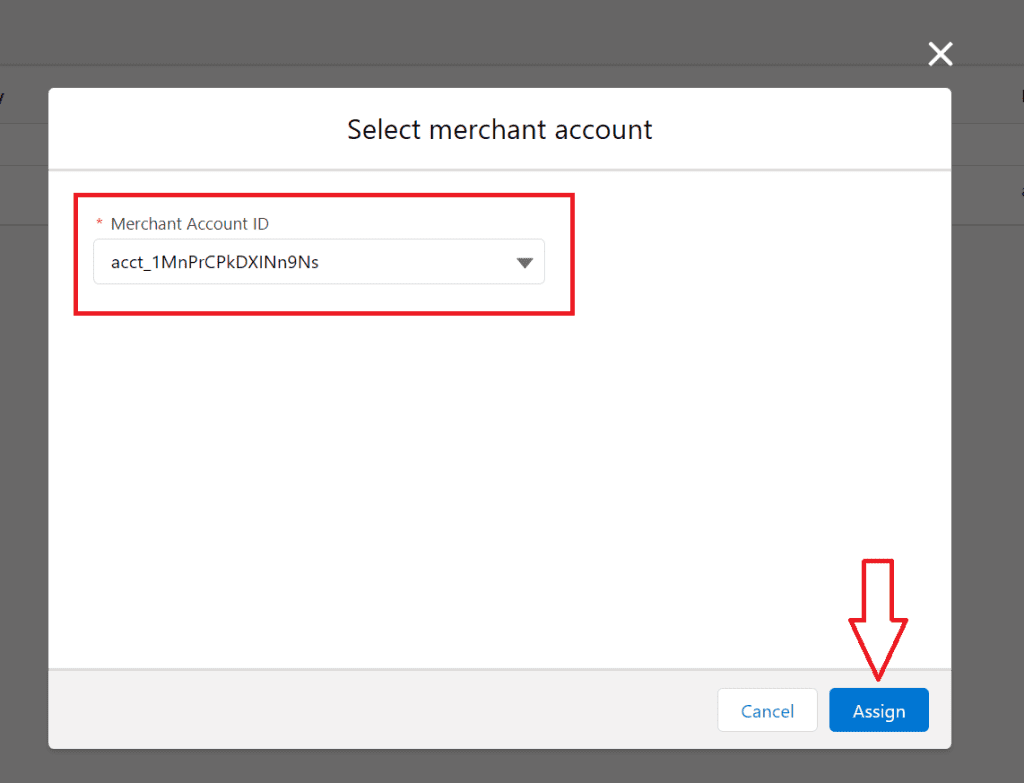
- Click Assign Merchant Account to assign the Stripe merchant account to the payment zone. This will open below the modal window. Select the Stripe Merchant Account ID and click Assign.
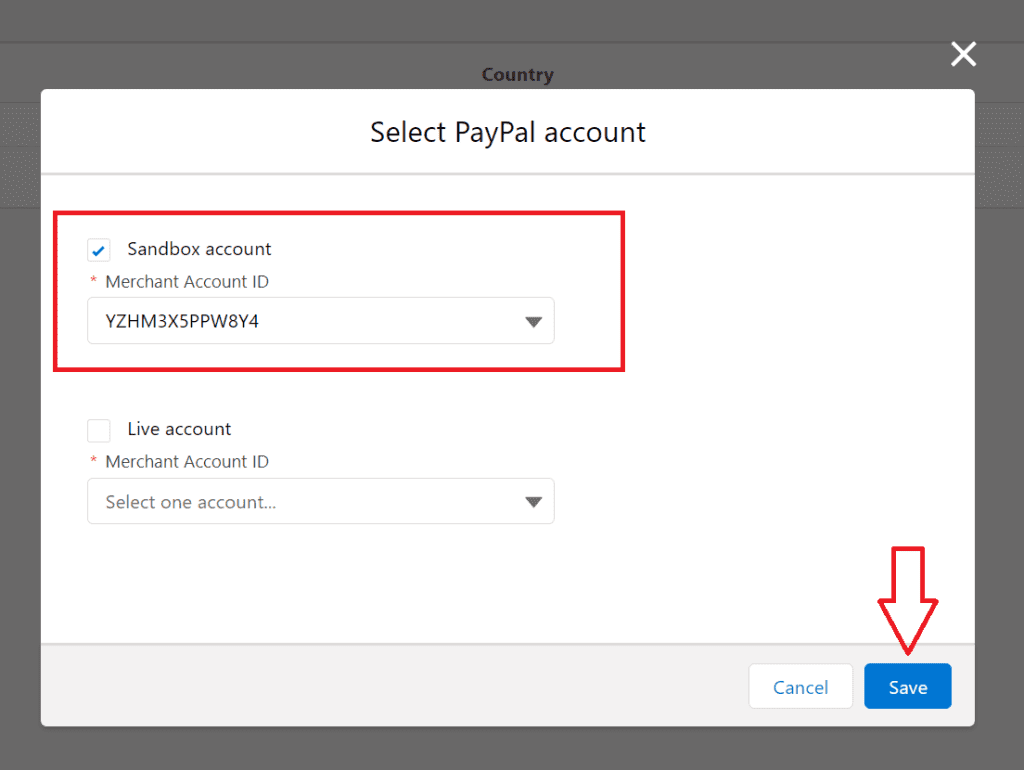
- Click Manage PayPal Accounts to assign the PayPal merchant account to the payment zone. This will open the below-mentioned modal window. Select the Sandbox account check box, Merchant Account ID, and click Save. With this step, creating a payment zone is complete.
Enable Salesforce Payments for Storefront
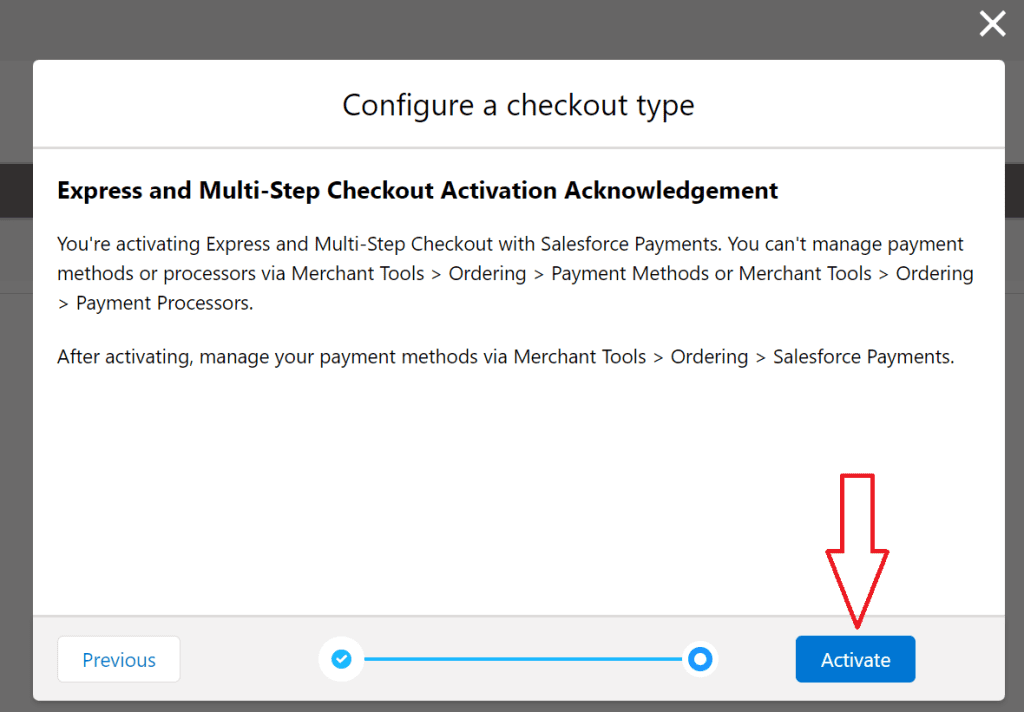
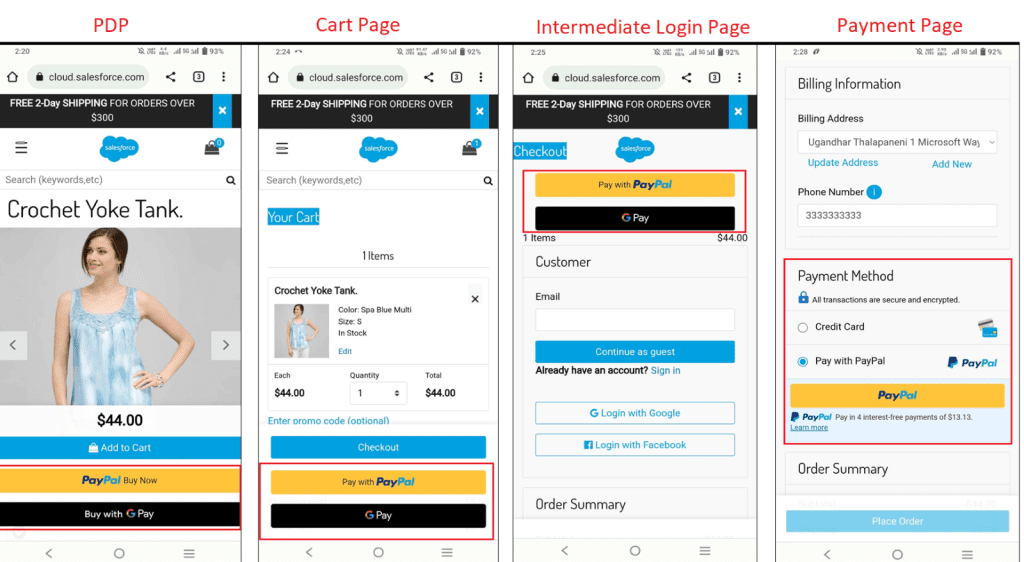
Go to Merchant Tools > Ordering > Salesforce Payments and click Configure. This will open below the modal window. Activate the checkout type of your choice and click Next. “Multi-Step Checkout” will activate the payment methods on the payment page, and “Express Checkout” will activate the payment methods in PDP, Mini Cart, Cart, and Intermediate Login Pages. In this case, I have selected both.
- Click Activate.
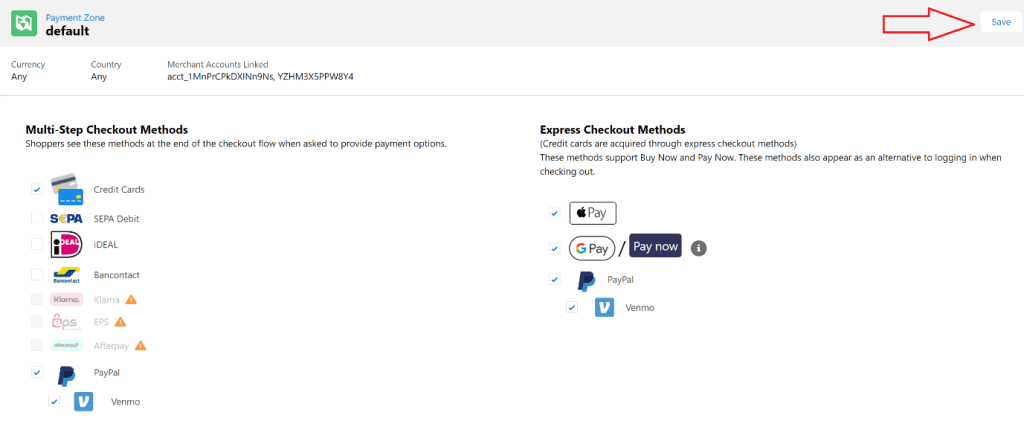
- The above step will add the default payment zone, where all the countries and currencies are selected. By default, all the payment methods supported are activated.
- If you would like to enable or disable payment methods of your choice, click the down arrow and click Edit.

- Select the payment methods of your choice and click Save.
- You can also override the default payment zone settings with the payment zone that you have created. Go to Merchant Tools > Ordering > Salesforce Payments, and click the Assign Payment Zone button.

- This will open the modal window below. Select the payment zone and payment methods of your choice for both multi-step checkout and express checkout, and click Save.
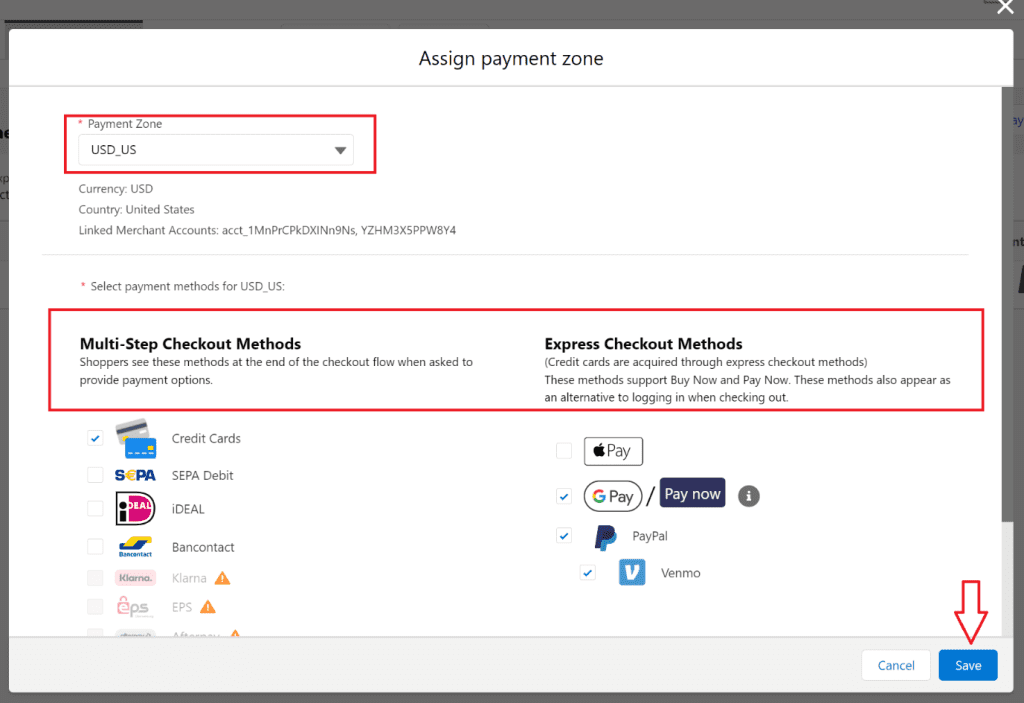
- You will see the below screen once you click the Save button on the above screen.

Install Salesforce Payments Plug-In
Clone the https://github.com/SalesforceCommerceCloud/plugin_commercepayments repository and set up the plugin_commercepayments cartridge. Do not skip this step. Without this, you will not see the payment buttons getting injected into the storefront.
That’s it. Now your storefront is ready to collect payments.
Results
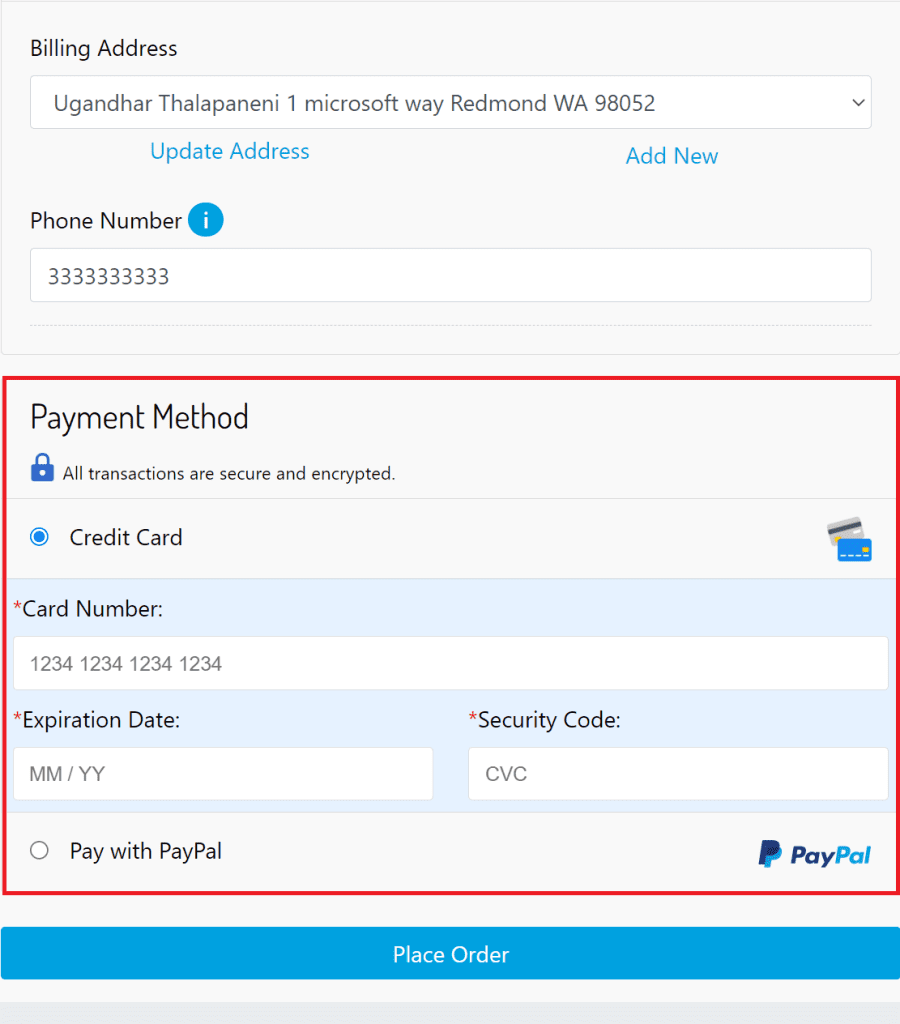
If you have successfully completed the above steps, you will start seeing the below screens in your SFRA storefront.
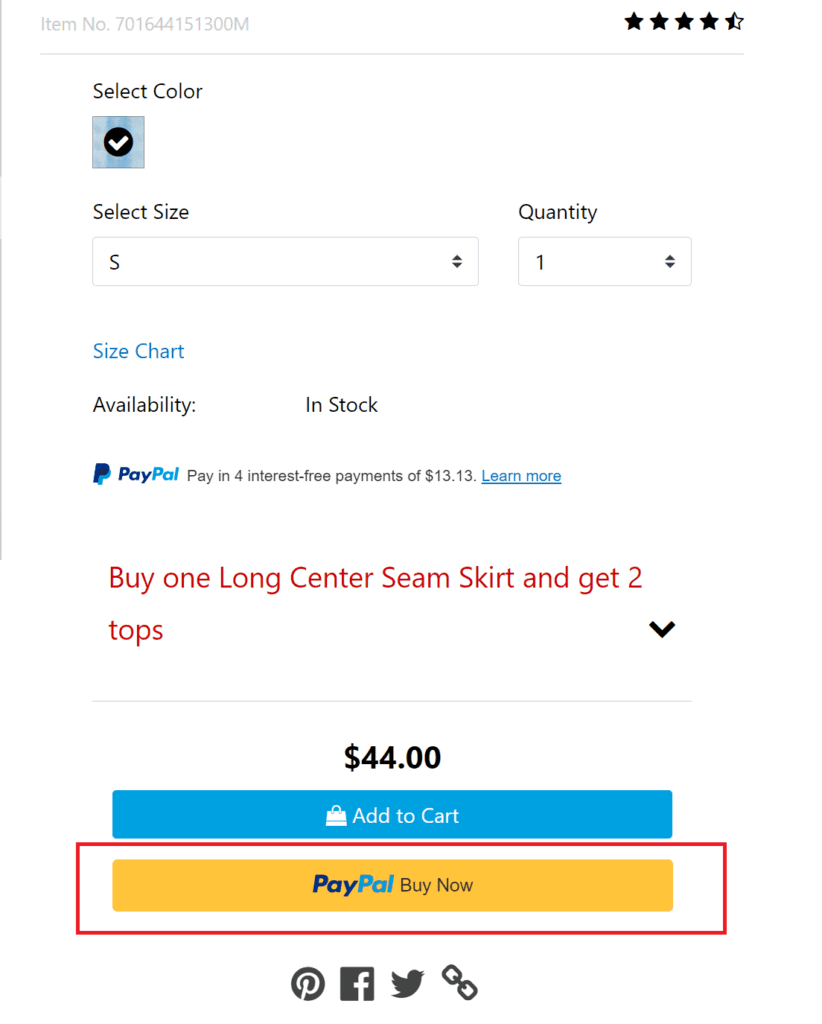
Product Detail Page: Desktop
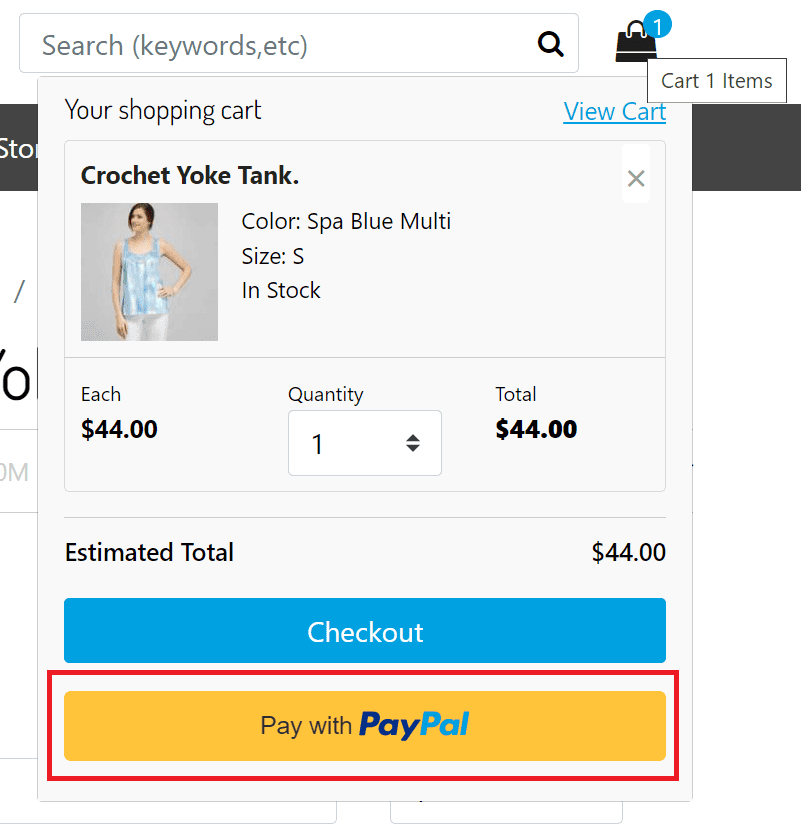
Mini Cart Desktop
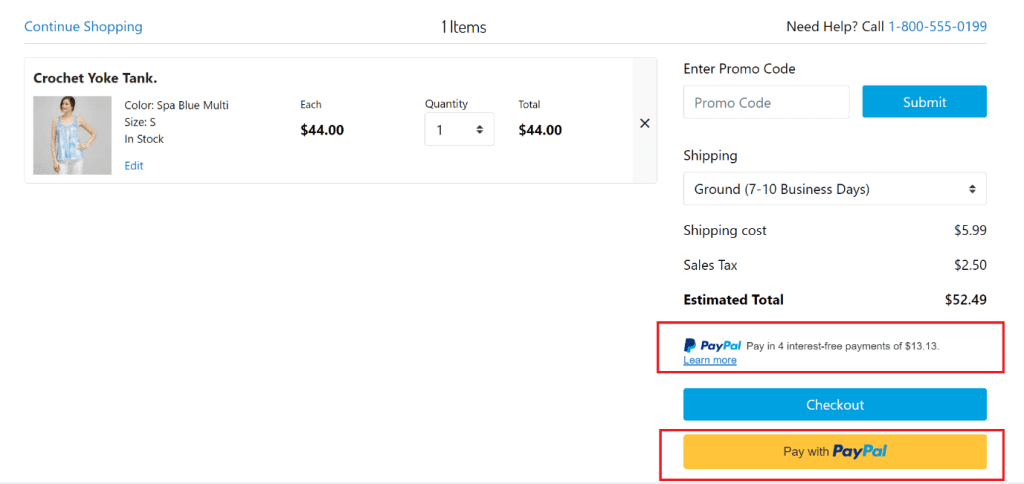
Cart Page – Desktop
Intermediate Login Page (Desktop)
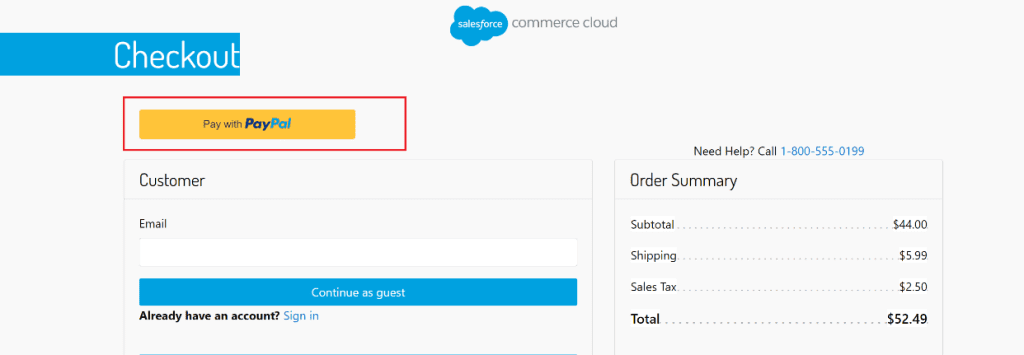
Payment Page – Desktop
Mobile View Screens
References
To learn more about Salesforce payments: